*waves* Hey y'all!! Soooo...I was going to do a blog post on the carrot soap adventure that I had, but decided to forgo that and jump to the fun filled weekend that I had at Miss Daisy's house. :) Her and I have been brainstorming, and we have been getting a bit crafty. So we planned a weekend of soap making adventures and thought we would add some additional things as well. So our Friday went a bit like this.... We decided we were going to do hot process batches, and got our three crock pots plugged in and ready to go. We began measuring our oils and then I realized that I left the Castor oil sitting on the table at home!! So while Miss Daisy continued to measure the oils that we were going to use, I scrambled looking for an adequate substitute for the Castor oil. I went on Google, and then began hitting every soap group that I am a member of on Facebook but unfortunately as I feared there was no substitute because Castor oil is an oil unto itself. So I decided on two different oils to try instead, and ran them through the SoapCalc. Yes, we were flying by the seats of our pants on this one! We got everything measured out and off we went! We got two of our crockpots going and decided to do a different recipe for the third one. This recipe included the addition of Blue Moon Harvest Moon Pumpkin Ale. Because we were working on the third recipe, we were unable to get pictures of the first two crockpot cooks. But we did manage to get the beer soap pictures. ;-)
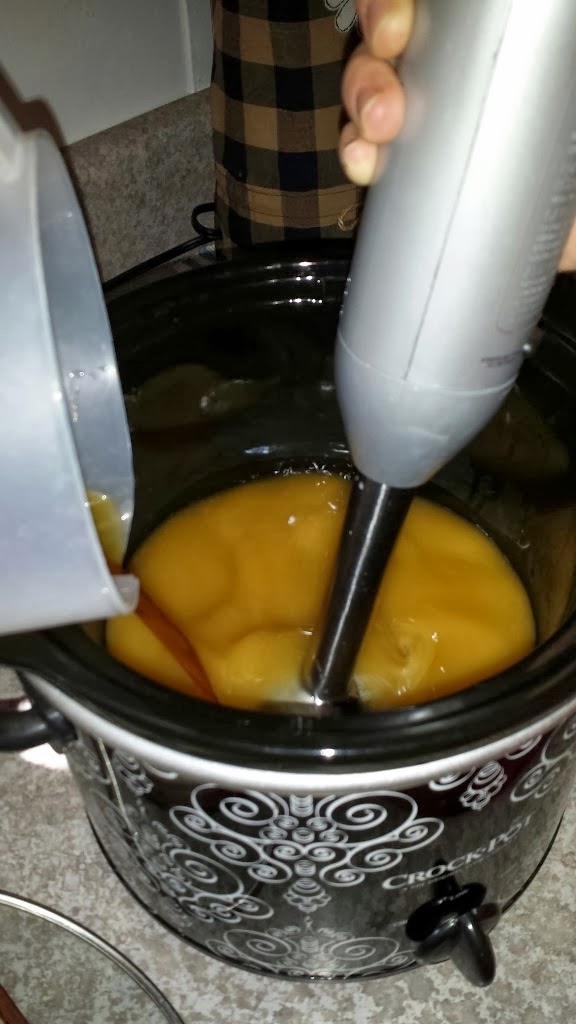
I added the Beer Lye mixture, and Miss Daisy stick blended away!
Miss Daisy brings the soap mixture to trace.
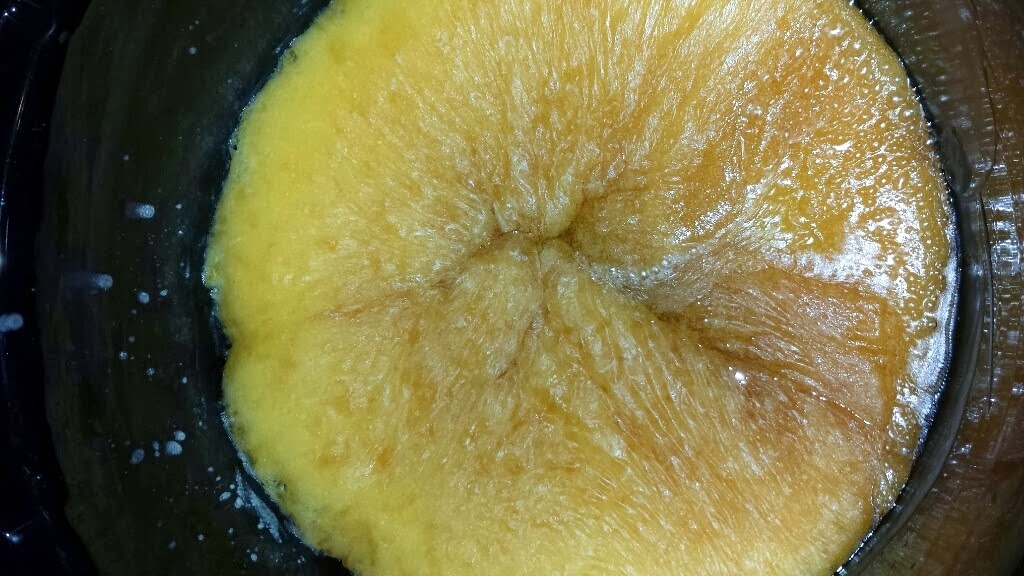
It didn't take as long for the beer soap to get to this phase as it did the other soaps we made.
Look at her cook! I was amazed at how quickly this cook went.
We only let it cook for a few more minutes after this. Once the soap cooled down we added a pumpkin spice fragrance to it. We had to work fast getting it in the mold, but as we were molding it, we put pumpkin embeds in.
The top looks a little messy because that sucker hardened up so quickly. We did manage to lighten up the top though.
Here are the pictures of the other two batches that were made during the same time.
Here is the Pumpkin Spice Beer Soap. I just want to mention that whenever you are doing embeds in a soap, it is best that you have enough embeds to fit the mold so that when you cut you get an embed in each. I am embarrassed to say that I had one pumpkin fall out that I had to put back in. *giggles*
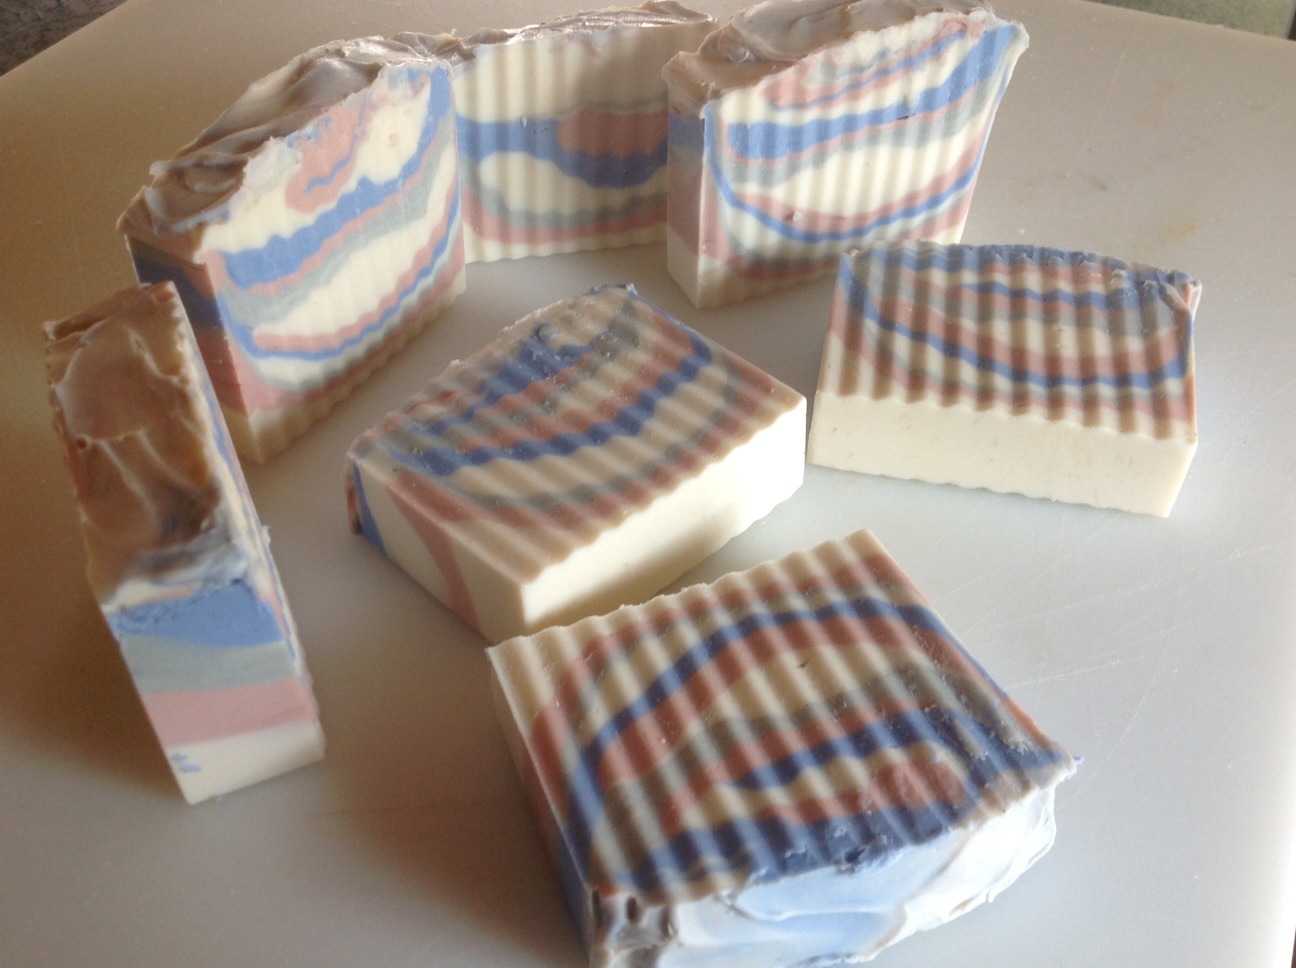
This is our Autumn Mums. The only difficulty we had with this one really was the purple not being as vibrant. It was slightly muted after drying. It is still a gorgeous bar. The smiley face was definitely a bonus.
This is our Falling Leaves soap run. Thank goodness Miss Daisy's Mister was there to offer an extra set of hands over the weekend! On this batch we decided we would do a sort of criss cross thing with embeds on top. It hardened so quickly that I am not 100% sure that I like the edges, but it does look rustic. The three of us got to the point to where we had to glop it in the mold, slam it down, and hope for the best. We unmolded and wallah!
Well these are all of the pictures that I have on hand of this run of soap. I do want to mention that we were able to unmold these three batches and cut the loaves within less than a few hours. I was pleasantly surprised. :) Ok folks, it's getting late here and I still have a few things to do (labels) before I can hit the hay for tonight! Please check back for the next part of this adventure. Suds & Bubbles, Soapy
*waves* Hey y'all! I hope everyone is doing great! So this weekend I headed to the mountains to see some of my favorite people, and get some soaping time in with a dear friend of mine, "Miss Daisy". Now Miss Daisy and I met eachother a few years ago at the start of our annual family camping trip. We met through Cyndy, of Cristal Dragon Candle Co. (I have all sorts of crafty friends and family members y'all!) Well... to make a long story short, awhile back Miss Daisy got the handmade crafting bug so to speak, and started making these wonderful sugar scrubs to sell! Goodness sakes you want to talk about yummy-ness on your skin! Woo-weee! Auh-mazing! Anyhow, we decided we were going to do a batch of hot process soap together over the weekend. So, here are some pictures of that adventure.
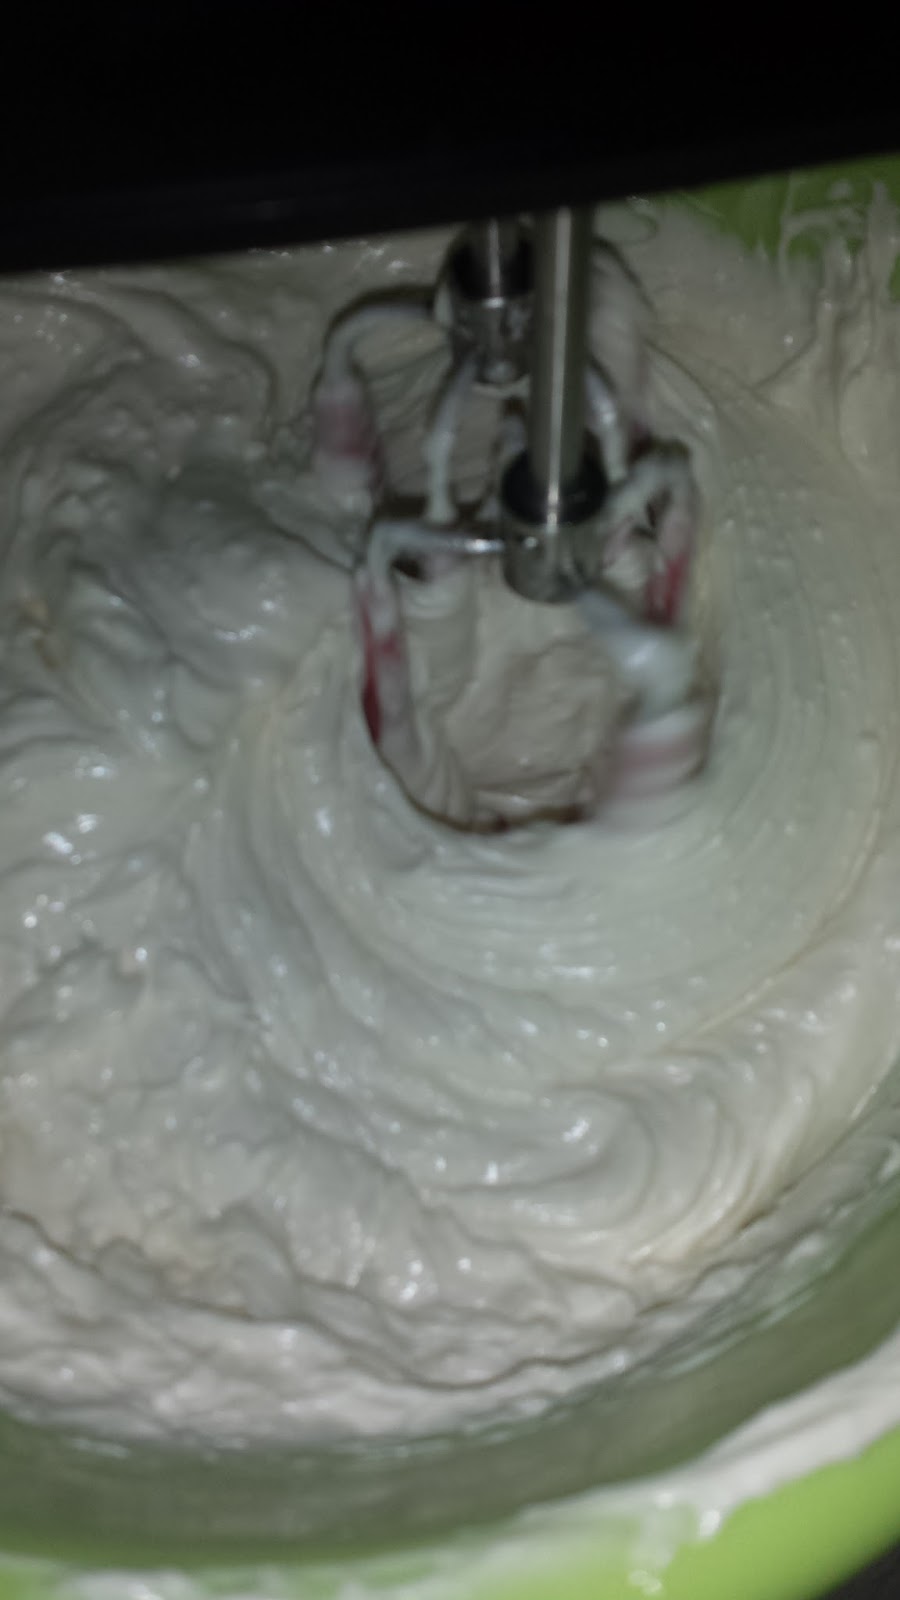
So Miss Daisy used the stick blender for the first time, and stick blended her very first batch of soap to trace. Well I say a batch of soap but it was a double batch to be exact. We had just enough room in that crock pot for the soap.
So this is the batch after cooking for awhile. We would check on it and stir it periodically until it reached complete stage.
Now you might be asking whats with all the oils on top...well...after it hit gel stage, we superfatted it with some additional goodies, and Miss Daisy began to stir.
Miss Daisy stirred the superfats into the gelled soap until they were completely incorporated and we then cooked it for about 30 more minutes after that.
Now, fast forward because since this was a double batch, we were busy and just didn't think about getting any pictures of the colors we chose. So we got it in both the molds, sprinkled some glitter on top and wrapped the tops of the soap. The next day we unmolded and one of the guys cut the soap for us. (Y'all know I can't cut soap straight to save my life! lol)
This was after the first soap loaf was cut. See the pretty glitter??? :)
So "The Misters" took the soap outside to see if the glitter catch the sun rays and sparkle a little more. It didn't, but it still looks pretty outside too doesn't it? Goodness sakes it has a light lovely fragrance to it also! :)
We did do a test from a couple of soap scraps we had leftover, and I plumb forgot to take a picture of the lathery and moisturizing loveliness of this soap. I will next time we use the hot process method, promise!! Well, that's it for this adventure! Stay tuned for the next blog post coming up soon about my adventure with Carrot soap! Suds & Bubbles, Soapy
*waves* Hey y'all!! Hope this finds everyone doing great! I have been busy soaping away, and I have embarked on another adventure with Floapies! Ok so I know that's a weird name but let me explain. You know how when you're in the tub taking a nice long luxurious bubble bath...and you drop the soap so you have to hunt around for it? Well when you drop a this particular soap it floats so your not hunting around for it..hence the name "Floapies". ;) In order to make Floapies you have to use a mixer and whip air into the soap batter.
For your listening pleasure while you peruse the pictures of my Floapie adventure, with a special shout out to Greta. (lol)
Solid and Liquid Oils before whipping them.
After whipping the solid and liquid oils. I realized later on that I should have waited to add the liquid oil while I was whipping the solid oils. It would have made bigger fluffier peaks. You live and learn though. Next time!
After slowly adding the chilled lye I "whip it good!" *does the dance and realizes she is without the red hat* Anyhow...back to the lye , it has to be chilled lye. I know it may sound weird, but warm lye will melt the solid oils.
It looks almost like frosting doesn't it? It would have been fluffier if I would have did what I mentioned earlier.
I separated this into two parts and colored one a teal color. (I know, surprise surprise!)
While you probably cannot see this very well, the teal turned into a pastel teal as a result of how white the soap batter is.
So I spooned it in my mold and did a slight swirl with it with the pastel teal and the white.
They look like little cupcakes don't they?
I had extra soap batter so I slapped it in one of my one pound molds and swirled it together.
Wallah! We have Floapies! Yayyy!
A Floapie close-up! By the way, if you love the smell of Downy, you will love the fragrance of these Floapies. It is pure heaven!!
Well, I hope you enjoyed the music along with my latest adventure! I have a ton of stuffs to do before I can call it a night! Check back soon y'all! Suds & Bubbles, Soapy
*waves* Hey y'all!! Hope this finds everyone doing great! It's been a bit since I have written, but of course as usual I have been busy as a bee. Not just because of schoolwork, but because I have been soaping like crazy to get ready for the major flea market event that I will be selling at the end of this month. I am also gearing up to officially open my online store. Last night I made a double batch of hot process soap that didn't go the way that I planned, so I have put it aside to shred. I plan to use it for laundry soap. So that got me to thinking about the mishaps (sometimes comical) that I have had when soaping. I thought I would share what I have learned thus far on this journey. 1) Wear gloves when you are doing soap dishes after making cold process soap. Raw soap batter under the nails hurts like the dickens! 2) You really shouldn't wear flip flops when your working with your lye liquid. The possibilities of accidentally splashing lye mixture on your foot are endless! 3) Be careful how hard you slam the mold down to get air pockets out of your soap batter, especially if it's hot process soap as to avoid accidentally waxing a portion of your eyebrow. I am exaggerating a bit about the waxed eyebrow, but it sure felt like it! 4) Make small batches when you are trying anything new until you get a feel of it. Just because it works right in your head, doesn't mean that it will on paper...err in a mold rather. ;) 5) Milk superheats...like crazy! 6) Goats milk smells to high heaven when you add lye to it, especially if you don't freeze the goats milk that you plan to use. However that smell will fade away. 7) If you freeze the other liquid that you use for your soap, the lye fumes are almost nonexistent. 8) Tis better to gel, than not to gel...unless it is a goat's milk based soap. Some folks will argue with that though. It's just been my experience anyway. 9) It is possible for your soap to not turn brown or beige when using goat's milk if you keep the temps low when making your mixture. 10) Fold in your herbal or exfoliant additives to your soap batter after you reach a thick trace, otherwise everything falls to the bottom. 11) Sodium Lactate can either be your best friend, or worst enemy in both cold and hot process soapmaking. 12) Give a new technique or method of soapmaking a chance. Just because it's different than what you're used to doesn't mean it won't work for you or isn't worth your time. 13) Ylang-Ylang EO smells horrible in cold process soap after cure time is up. It turns into a wet diaper smell. I had to chuck 3 pounds of soap after gagging and almost passing out. 14) If you use any type of tea for your lye mixture, it will darken the entire batch of soap. Don't bother using colorants unless its to try to lighten it. 15) Using shredded soap to top your loaf of soap really isn't as cute as you think it may be and most will fall off anyway. 16) Embeds need to be soft and in some cases damp when you put them in soap, otherwise they won't stick. 17) Using coffee in soap turns the soap a dark color...there is no need to use colorant thinking that the soap will be too creamy and light without the color. 18) Not every soap has to have a textured top in order to be pretty. 19) Glitter is a pain in the butt, and not everyone wants that on their soap! 20) A little goes a long way. 21) It is better to spoon out the powdered colorant that you need for your soap, instead of thinking that you can sprinkle from the bag without an accident. 22) Keep detailed notes and logs of every batch of soap. 23) The fragrance that you use can be what can turn your well made plans into a "hot mess that you have to glop into the mold" and hope for the best. Most suppliers have details about how the fragrance reacts in cold process soap...read it! If you are unsure about it, test in a small batch. One important thing to note: Be sure that the fragrance is safe for soap. (gosh I sure have been learning alot haven't I?) 24) Not all suppliers are created equal, so do your research. If there are a ton of soapers that have had problems with a supplier, you will likely not be the exception to the rule. It isn't worth the risk because the prices are lower than other suppliers. 25) It is worth a few extra bucks for quality ingredients and supplies. 26) Not every batch of soap you do will be perfect or a success. Things do happen. Even the most experienced soap maker has the occasional soap mishap and failed batch, so don't give up. You learn, you grow, and you move on to the next batch of soap! So those are some things just off the top of my head right now. I am sure that I will be adding to that list as time goes on. I will be posting pictures soon...but for now it is time for me to get back to soaping! Have a great weekend folks, and check back soon! Suds & Bubbles, Soapy
*waves* Well hey y'all!! Good gosh it's sure been a long time hasn't it? So much has happened and I don't even know where to begin. I had to take a slight break from making soap, not just because I was busy with schoolwork and my family, but my health put things behind too, and I was unable to open as planned. Thankfully I was able to get some things fixed (there are wonderful Doctors in Chapel Hill!), and here I am...feeling so much better than I was before! I sure have missed whipping up some soap! So now that I am doing better, I have been busy in the shop!! Without further adieu *giggles*, here's what I have been working on. Soooo.....the other day I spent all day in the shop, and I went in with laid out plans only to decide to do something different. So I decided that I was going to break out some essential oils and herbs and see what happened!!
This is my Lavender Tea soap. Now if y'all will remember, I used to do the pictures of the complete process, but I didn't have my camera buddy out there, so it will be just the story and the finished product. Believe it or not I used purple in here but instead of using it where I was able to make the soap batter white, I used it in an attempt to make the uncolored batter a more purple color not realizing that the tea would turn a beige color. What I should have done was make the entire batter white, then used a purple color. Let's just chalk it up to me having "a moment", and remembering this lesson for next time. lol At any rate, it smells yummy with the Lavender Essential Oil that I used!!
Here is my Tea Tree with Aloe Shampoo bars. Goodness sakes I love this one! I have these little mini loaf molds that I thought would be just darling for this batch, and it did not disappoint! I love how the top textured, although on one of the loaves, the top was a little higher than the other. ;)
While I didn't like how the top textured (story coming in a moment), I do still think it came out beautiful. This one I am calling Teakberry! The fragrance is a yummy combination of bamboo, teakwood, tayberry, blackberry, mulberry, cloud berries, peaches, red clover and sweetgrass. It is berrylicious!! Now, when I got this fragrance I noticed that some folks had mentioned that it accelerated their soap just a little bit, but I figured if I soaped at lower temperatures that I would be fine. Boy was I wrong!! lol Now I managed to get the batter colored but only just. But by the time I got to the top of the loaf, I realized that the middle was higher than the rest of the loaf. So my husband, bless his heart, tried to be helpful and smooshed down the top of what I had textured to get it even. Yes...I said smooshed. Now mind you, he didn't mean to mess up the top, and I fixed it as best as I could. Unfortunately I couldn't do a whole lot with texturing the top after that since it had accelerated due to the fragrance. So I decided to use my crinkle cutter and wallah! I sure do love how the colors came out and land sakes it smells so yummy! If everyone loves this fragrance I will do it a bit differently next time.
Ok folks, there's the big update! I am trying a couple of new things out in the shop, but now I have to run and get my homework finished. I sure hope everyone is having a good summer break, and please check back in soon for another one of my adventures! Suds & Bubbles, Soapy
*waves* Hey y'all! Hope everyone had a great holiday season! As usual it was busy in my household! I can't be on here long, but I wanted to show everyone some of the latest soaps I have been doing over the past couple of weeks.
I also wanted to share that I have finally tried the hot process method! After the first try with hot process soapmaking (I made shampoo bars), I was not to sure that I cared for it too much, simply because I didn't like what the end result looked like, and I was limited on what I could do with it. However, the bar was amazing! So I decided to try it again and do a fragrance free, and color free batch of shaving soap. I wanted it to have a bit of an Old-Timey appearance and this is how it turned out.
I think I am actually going to like this method of soap making, but am going to reserve it for certain lines.
I have also started doing sketches of designs that I want to implement in my soaps and I had everything planned out. Unfortunately some of the best laid plains can go haywire at the slightest glitch. This next batch was regarding the color. It was supposed to be brown and pink...and I wanted to darken the brown a little bit so I used some black. Well...I say some, but apparently it was a bit too much so it came out grey and pink. lol It still looks good though and actually fits the fragrance that I used.
I think it came out interesting. ;)
Ok so another mishap I had was with an EO (Ylang-Ylang). I like the scent, but was not expecting it to accelerate the soap batter the way that it did. I even soaped at a lower temperature just in case. When I added the EO, it actually appeared the slow it down a bit so I separated and colored the batter. The next thing I knew the batter hit thick trace and I had to work fast to get it in the mold before it was too hard. It was my plan to swirl, and only layer two parts of the batter. Instead the result was the below.
So it looks interesting, but not sure that it really suits the Ylang Ylang EO.
Well folks, it's been a busy day for me, and it is getting late. Feel free to drop me a line and let me know what you think. I will be checking back in soon! ;)